I received this rifle exactly as it was found in Nepal, having been in storage there for more than 125 years. At first glance, it looked horrible beyond redemption. Rescuing this was going to be a challenge. The metal was rough and everything was encrusted in filth. The wood was black. Handling the rifle left the hands black and sooty, giving the impression of it possibly having been in a fire. Not very encouraging.
Upon examination, the rifle was mostly there. The buttplate was gone. Except for some worm damage, the stock seemed sound. There were no major cracks or breaks. Even all three band springs were present (now, that’s a miracle). Closer scrutiny of the shipping box turned up the wayward brass buttplate.
My objective was to clean off the grime and stabilize any further deterioration, without removing the original surface patina. I wanted a clean musket that did not look cleaned. I’m a conserver; not a refinisher. I want to keep things the way they originally were. I had hoped for a rifle in shootable condition, although, that did not’t seem likely at this point. I carefully disassembled the rifle.
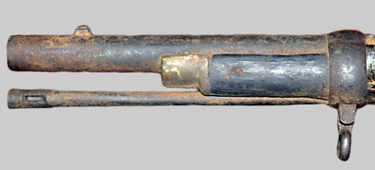
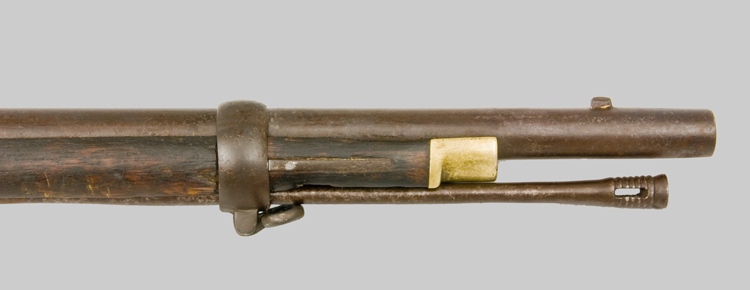
There was good news and bad news. The good news was that everything came apart; and nothing fell apart. No stripped screws or other damage done. The bad news was that the barrel, ramrod, and barrel bands were rusty and pitted where metal had been in contact with wood. Not entirely unexpected, due to the lengthy storage. None of the rusted surfaces would show on the re-assembled rifle.
An overnight soaking in mineral spirits did little to soften or loosen the scaly encrustations. Working carefully with a dental pick, I was able to remove some of the deposits. However, this left the surface still looking rough and rusty-colored. As I studied the surface, it became apparent that what looked like rust, was not rust at all. It seems that the exposed metal surfaces had been coated with grease; the grease had picked up a solid layer of dirt from red clay soil; and, in 125 years, had hardened into something that could have substituted for concrete. I stepped up the chemical warfare and went at the deposits with denatured alcohol. Much better. The encrustations came off more easily, although still requiring tedious work with the dental pick. The alcohol left the remaining deposits discolored, making it obvious where more work was needed. While I worked on the barrel, I tossed the bands and screws in a jar with some alcohol. After days of filthy tedium, I finally came away with a fairly nice barrel. The metal was surprisingly well preserved, with no pitting at all on the exposed surfaces. A surprising amount of the original bluing was still present.
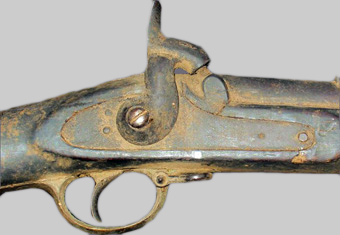
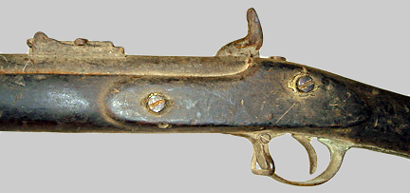
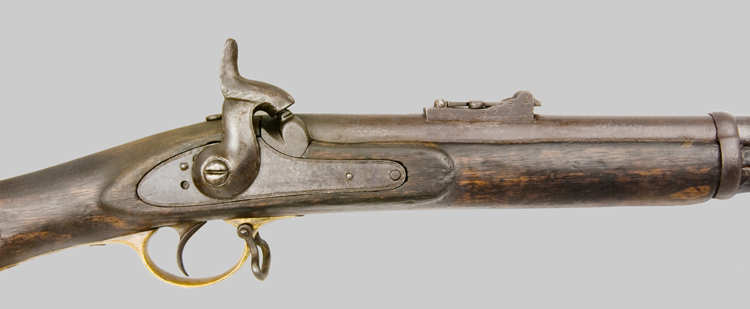
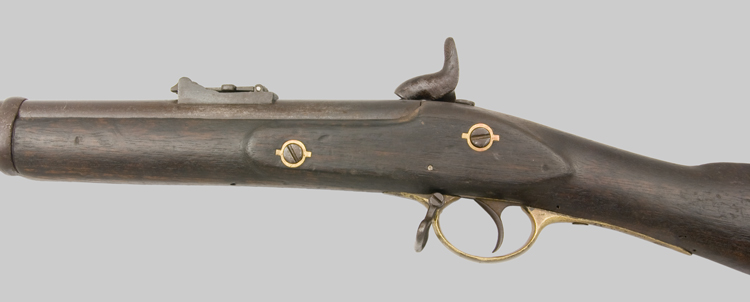
The lock was amazingly well preserved. The interior of the lock was greased. The grease had not hardened and came off easily. Once cleaned, the exterior lockplate and hammer retained much of the original bluing. It looked more like it had been made last year, than last century.
As one might expect, the nipple was plugged solid. I used this to my advantage. I poured mineral spirits down the barrel and let it soak overnight. After pouring out the contents, I started in on the bore. First, a few patches with bore solvent. Then a good brushing with a 20 gauge shotgun brush. Then some more patches. Not too bad. Some rust, to be sure, but not much. It felt smooth, not like the sewer-pipe I expected to find.
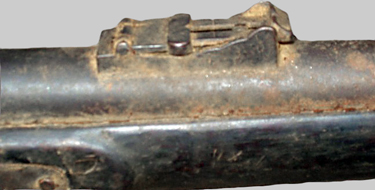
The moment of truth had arrived. Time for a look at the rifling. One can’t see far down a blind hole with a flashlight, so I employed a simple trick. I found the largest lead bullet that I had on hand. It was a .45 caliber, flat nosed bullet I used for the 11.15 x 60 mm. M1871 Mauser rifle. I polished the bullet’s nose up nice and shiny, and then dropped it down the barrel. Now, when I aimed light down the barrel, the bullet nose acted as a reflector and provided nice illumination. Rifling. Lots of rifling. Bright and shiny. Amazing! It was beginning to look like a shooter after all. I poked at the debris in the nipple, and then blew down the barrel. Out came a blast of debris and solvent. Voila!
I cleaned the bands and other small parts using a brass brush. This removed the loose rust scale, without harming the underlying surface. The brass triggerguard and nose-cap were heavily calcified. Using denatured alcohol and a rag, I cleaned the brass. To ensure that the patina would remain intact, I decided to use only my fingernail as a scraper. What was not’t removable with a fingernail, stayed. The result was just what I was looking for. No grime; patina intact.
By now, it was obvious that this rifle was very well made. The standard of fit and finish are excellent. Certainly factory or arsenal produced. Not a knock-off, Afghan “Khyber Pass” rifle. Waaay too nice for that.

I believe this musket to be of Nepalese manufacture, dating from the period surrounding the Sepoy Rebellion of 1857–58. The Gurkhas had fought the British to a standstill in the Anglo-Nepalese War of 1814–1816, earning the respect of British Officers. When the Bengal Army mutinied in 1857, 10,000 Nepalese Gurkhas, led by the Prime Minister, threw in with the British to put down the rebellion. From that point on, the Nepalese enjoyed favored status with the British government, receiving much in the way of military assistance and weaponry. Gurkha units fought along side the British in almost every subsequent 19th and 20th Century war, earning a stellar reputation. During World War II, over 250,000 Nepalese Gurkha’s made up 55 battalions of the British Army, serving in North Africa, Europe, and the Pacific. Gurkha units remain part the British Army today.
I did not want to use harsh cleaning methods on the stock, because I wanted the wood to retain its original character. Mineral spirits and a rag did nothing to remove the black deposits. Mineral spirits and 0000 steel wool did not do much better. The stock was coated in a black substance that looked like paint. However, I was sure that they would not have painted the stock. After studying it some more, it dawned on me what it was.
It was layer, upon layer, of almost pure carbon that had built up over the 125+ years the rifle sat in storage. I suspect that most of the people who lived near the Armory used wood or charcoal for cooking and heating. With an annual per capita income under $500, Nepalese city-life surely did not come complete with the piped-gas and running water comforts to which we are accustomed. The air was probably full of soot, almost year-round. I mentioned my theory to a colorful collector-friend, who knew some of the inside story behind this fabulous cache of weaponry. His response rather bluntly confirmed my theory. He said, “Remember the 150 bronze cannon that were recovered? The [censored] had been burning the carriages.” Oh, the humanity! Those cannon dated from the Napoleonic Wars, and they were using the carriages for firewood.
Like it or not, removing these stubborn deposits would require the heavy artillery. Out came latex gloves and Easy-Off oven cleaner. Crude, but effective. If I wanted the black stuff gone, I would have to take my chances. Just like in the kitchen: spray it on; wipe it off; try not to gag on the fumes; spray it on; wipe it off; . . .. After three or four applications, and half-a-roll of paper toweling, I had removed a fair amount of the soot. This revealed enough to determine that the stock was made of walnut. That made sense. English Walnut (juglans regia) is native to Western Asia, where this rifle was most likely manufactured. I continued working the stubborn areas with oven cleaner. After a dozen or more additional treatments, over several days, the soot was gone.
The next step was to apply steam. Steam would accomplish a couple of things. It would raise some of the dents and would humidify the bone-dry wood. Using a hot clothes iron and a clean, wet towel, I forced steam down into the wood. I decided to repair the worm-eaten heel, but leave the remainder of the worm damage alone. Worms were a part of this rifle’s history and it would not be right to eliminate all traces.
I knew that traditional wood-filler would not be sufficiently durable. I found a High-Performance Wood Filler by Minwax that claimed to be strong enough for durable repairs. I knew it was a resin of some kind, because it came with a tube of catalyst. When I opened the can at home, the odor was unmistakable: Bondo. Well, heck. If Bondo is durable enough to ride around on a car, it should be durable enough for this. Using the buttplate as a guide, I built up the heel about 1/8 of an inch at a time. I taped off the surrounding area, to protect the wood, and carefully sanded the repair to a perfect profile.
The greater challenge was going to be making the repair match the surrounding wood. I wiped down the stock with mineral spirits. This temporarily revealed what the wood would look like, once it has been oiled. It looked great. Nice and dark, like a 150 year old stock should. I made up a practice sample of the filler. I tried the darkest wood stain that I could find. Much too light.
The resin was not sufficiently absorbent to go with stain alone. Next, I took some brown paint I had, mixed it with some of the stain, and applied it with a Q-Tip. Closer, but still too light. After letting the test sample dry a little, I applied another coat of stain, over the tacky paint/stain mixture. Very close. I applied this two-step treatment to the repair until I was satisfied. Then, I treated the wood with a 50–50 mixture of boiled linseed oil and turpentine. It looked good. Really good. The patina was there. It did not look refinished. The next day, I remembered a flat-black touch-up paint pen that had been used for another project.
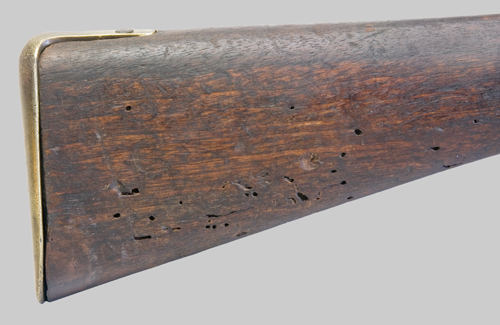 I put a few dots of paint on my test sample and wiped it carefully with my finger. Perfect! Just what was needed to simulate the black grain of the walnut. After going over the repair in similar fashion, it was so well blended that the repair was almost invisible. Can you spot the repair? After three more coats of the linseed oil/turpentine mixture, the musket was ready to reassemble. Reassembly was quick and easy. The many hours of tedious, filthy work paid off. The musket looked great. It was hard to imagine that this was the same ugly duckling that emerged from the shipping box. A very respectable example of the classic Enfield rifle-musket.
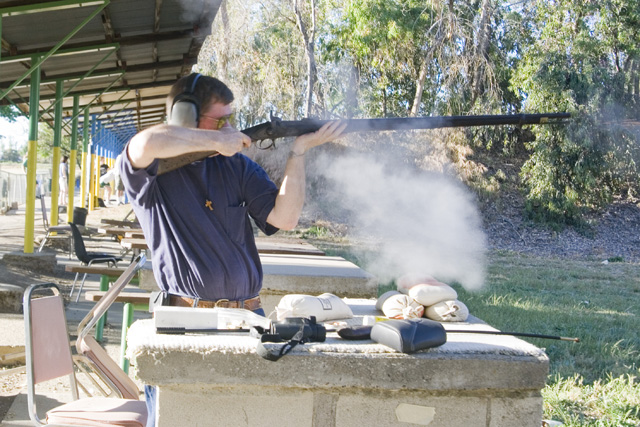
After gathering all that was needed, it was time for a trip to the range. After 125+ years of silence, the old Enfield proved that it could still breathe fire. Although I still have some work to do to find an accurate loading, the rifle functioned flawlessly.
I never thought that I would own a shootable 19th Century musket. As the preceding pictures illustrate, there was a very well-preserved 150 year old rifle underneath all that grime. However, much of the story behind this rifle would have remained hidden, if it were not for the preservation process. This lengthy, dirty and rewarding job shows that, sometimes, history is hiding in plain sight, just waiting to be discovered.
© Ralph E. Cobb 2011 All Rights Reserved